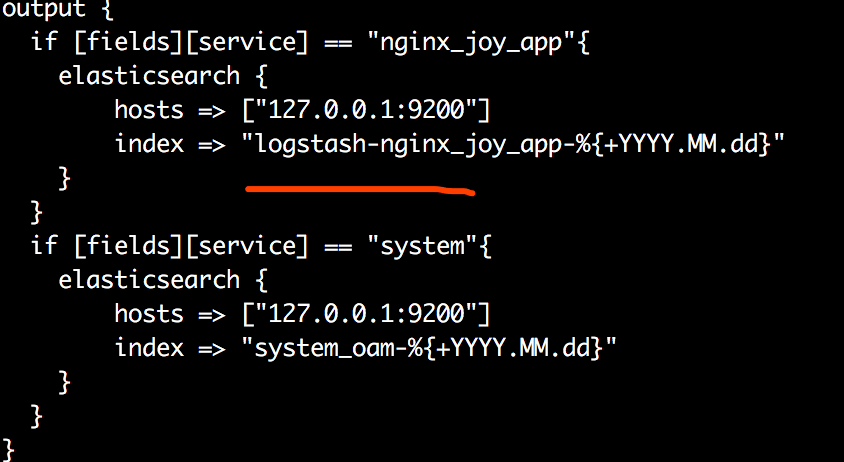
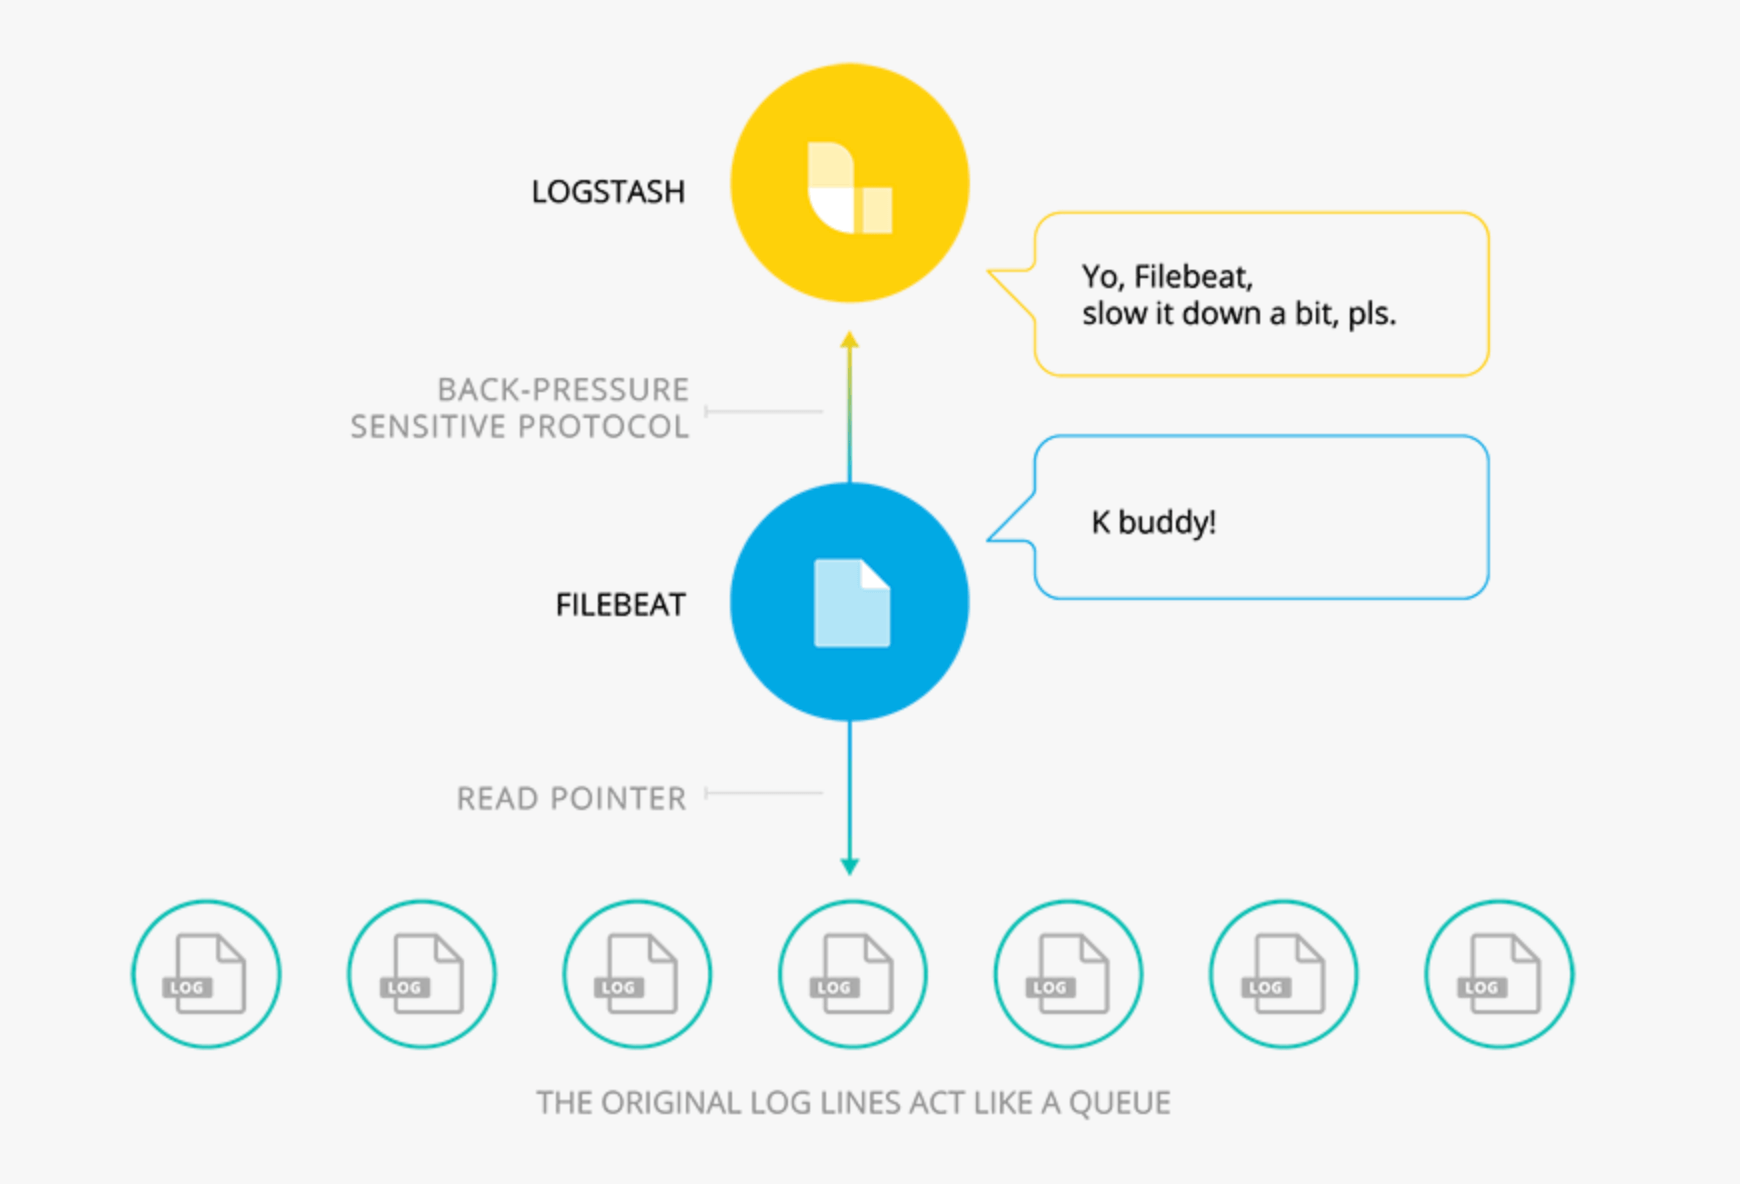
简介 基本组件 Elasticsearch 作为存储和索引这些数据; Filebeat 日志文件托运,传送给Logstash; Logstash 去插入数据到elasticsearch; Kibana 作为展示平台。 基本架构 其中filebeat是作为轻量级的logstash来工作。每台机器上只需要部署filebeat,然后向1台logstash传输即可。
实际相关 服务器
1 10.110.1.18 Filebeat+Logstash+Elasticsearch+Kibana
路径
1
2
/usr/local/elk /etc/filebeat
版本
1
2
3
4
elasticsearch-6.4.2 kibana-6.4.2 logstash-6.4.2 filebeat-6.4.2
安装 依赖环境 Elasticsearch requires at least Java 8. Specifically as of this writing, it is recommended that you use the Oracle JDK version 1.8.0_131. Java installation varies from platform to platform so we won’t go into those details here. Oracle’s recommended installation documentation can be found on Oracle’s website. Suffice to say, before you install Elasticsearch, please check your Java version first by running (and then install/upgrade accordingly if needed):
1
2
3
java version "1.8.0_91" Java(TM) SE Runtime Environment (build 1.8.0_91-b14) Java HotSpot(TM) 64-Bit Server VM (build 25.91-b14, mixed mode)
简单说jdk版本必须为1.8以上。
1
2
3
4
5
6
7
8
9
10
11
cd /usr/src/ && tar -zxvf ./jdk1.8.0_91.tar.gz -C /usr/local ln -s /usr/local/jdk1.8.0_91 /usr/local/java echo ' #JDK ############################################################ export JAVA_HOME=/usr/local/java export PATH=$JAVA_HOME/bin:$PATH ############################################################ ' >> /etc/profile source /etc/profile java -version
系统参数设定 1 2 3 4 5 echo "vm.max_map_count=262144" >> /etc/sysctl.conf echo " * soft nofile 65536 * hard nofile 65536" >> /etc/security/limits.conf && \ echo "ulimit -c unlimited" >> /etc/profile
如果es启动的时候不生效,可以关闭当前窗口,重新打开。
下载 1 2 3 4 5 6 7 8 9 10 11 12 13 14 15 16 17 18 cd /usr/src wget https://artifacts.elastic.co/downloads/elasticsearch/elasticsearch-6.4.2.tar.gz wget https://artifacts.elastic.co/downloads/kibana/kibana-6.4.2-linux-x86_64.tar.gz wget https://artifacts.elastic.co/downloads/logstash/logstash-6.4.2.tar.gz mkdir /usr/local/elk wget https://artifacts.elastic.co/downloads/beats/filebeat/filebeat-6.6.1-x86_64.rpm yum install filebeat-6.6.1-x86_64.rpm tar -zxvf elasticsearch-6.4.2.tar.gz -C /usr/local/elk/ tar -zxvf kibana-6.4.2-linux-x86_64.tar.gz -C /usr/local/elk/ tar -zxvf logstash-6.4.2.tar.gz -C /usr/local/elk/ cd /usr/local/elk ln -s elasticsearch-6.4.2/ elasticsearch ln -s filebeat-6.4.2-linux-x86_64/ filebeat ln -s logstash-6.4.2/ logstash
其中filebeat有些特殊,如果需要读取/var/log下的日志,注意启用用户的权限问题。至于安装方式可以选择RPM方式,启动更为简单,毕竟启动后基本就不会再动。
配置 elasticsearch 配置文件 需要修改的地方,重点是data目录,注意磁盘空间,时间久了会爆满的!!!
1 2 3 4 5 6 7 #vim /usr/local/elk/elasticsearch/config/elasticsearch.yml cluster.name: es node.name: elk-1 path.data: /joyfs/oam/elk/es-data path.logs: /joyfs/oam/elk/es-logs network.host: 0.0.0.0
启动 1 /usr/local/elk/elasticsearch/./bin/elasticsearch -d
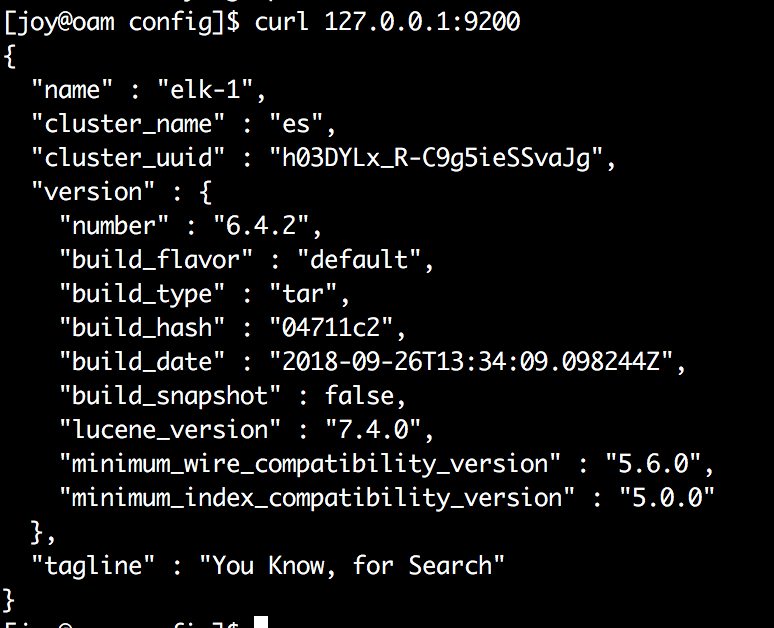
检查 访问9200端口或者浏览器也可以。出现下面信息表示运行正常。
1 2 curl http://127.0.0.1:9200
kibana 配置文件 基本没有什么需要配置的
1 2 3 4 5 6 7 #vim /usr/local/elk/kibana/config/kibana.yml server.host: "10.110.1.18" #切换地图高德,最后加上这一段 tilemap.url: 'http://webrd02.is.autonavi.com/appmaptile?lang=zh_cn&size=1&scale=1&style=7&x={x}&y={y}&z={z}' tilemap.options.minZoom: "1" tilemap.options.maxZoom: "10"
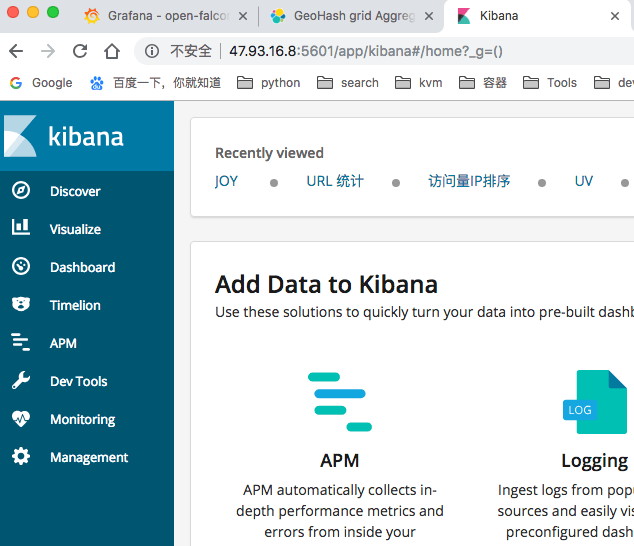
启动 访问默认5601端口
filebeat 配置文件 1 2 3 4 5 6 7 8 9 10 11 12 13 14 15 16 17 18 19 #=========================== Filebeat inputs ============================= filebeat.inputs: #按照以下示例增加多个日志类型 - input_type: log enabled: true paths: - /joyfs/logs/nginx/9011/c1/logs/access.log - /joyfs/logs/nginx/9011/c1/logs/error.log - /joyfs/logs/nginx/9011/a1/logs/access.log - /joyfs/logs/nginx/9011/a1/logs/error.log fields: service: nginx_joy_app #----------------------------- Logstash output -------------------------------- output.logstash: #该地址为filebeat => logstash 地址端口 hosts: ["10.110.1.18:5044"]
如果需要配置logstash的负载均衡,就需要增加下面的配置
1 2 3 output.logstash: hosts: ["localhost:5044", "localhost:5045"] loadbalance: true
启动 检查日志如果不报错就可以。
logstash 配置文件 没啥可修改的,如果愿意的话修改一下日志目录和data目录
1 2 3 4 #vim /usr/local/elk/logstash/config/logstash.yml path.data: /joyfs/oam/elk/logstash-data path.logs: /joyfs/oam/elk/logstash-logs
过滤执行文件 1 2 3 4 5 6 7 8 9 10 11 12 13 14 15 16 17 18 19 20 21 22 23 24 25 26 27 28 29 30 31 32 33 34 35 36 37 38 39 40 41 42 43 44 45 46 47 48 49 50 51 52 53 54 55 56 57 58 59 60 61 62 63 64 65 66 67 68 69 #vim /usr/local/elk/logstash/config/conf.d/joy.conf input { beats { port => 5044 } } filter { if [fields][service] == "nginx_joy_app" { grok { match => { "message" => '%{IP} - %{NGUSER:auth} \[%{HTTPDATE:timestamp}\] "%{WORD:verb} %{URIPATHPARAM:request} HTTP/%{NUMBER:httpversion}" %{NUMBER:response} (?:%{NUMBER:bytes}|-) (?:%{NOTSPACE:request}|-) (?:"(?:%{URI:referrer}|-)"|%{QS:referrer}) %{QS:agent} %{IPORHOST:clientip} %{URIHOST} %{BASE10NUM:request_duration}' } } useragent { source => "agent" target => "device" } date { match => [ "timestamp","dd/MMM/yyyy:HH:mm:ss Z"] } geoip { source => "clientip" target => "geoip" database => "/usr/local/elk/logstash/GeoLite/GeoLite2-City.mmdb" add_field => [ "[geoip][coordinates]", "%{[geoip][longitude]}" ] add_field => [ "[geoip][coordinates]", "%{[geoip][latitude]}" ] } mutate { convert => [ "[geoip][coordinates]", "float"] remove_field => [ "tags", "offset", "host", "beat" ] } } if [fields][service] == "system" { grok { match => { "message" => "%{COMBINEDAPACHELOG}"} } mutate { remove_field => [ "tags", "offset", "host", "beat" ] } } } output { if [fields][service] == "nginx_joy_app"{ elasticsearch { hosts => ["127.0.0.1:9200"] index => "logstash-nginx_joy_app-%{+YYYY.MM.dd}" } } if [fields][service] == "system"{ elasticsearch { hosts => ["127.0.0.1:9200"] index => "system_oam-%{+YYYY.MM.dd}" } } }
注意nginx日志索引必须为”logstash-xxxx”,否则地图会找不到字段。
配置地图 1 2 3 4 5 cd /usr/local/elk/logstash mkdir GeoLite cd GeoLite wget http://geolite.maxmind.com/download/geoip/database/GeoLite2-City.mmdb.gz gunzip GeoLite2-City.mmdb.gz
注意和配置文件里的GeoLite2-City.mmdb路径保持一致!!!
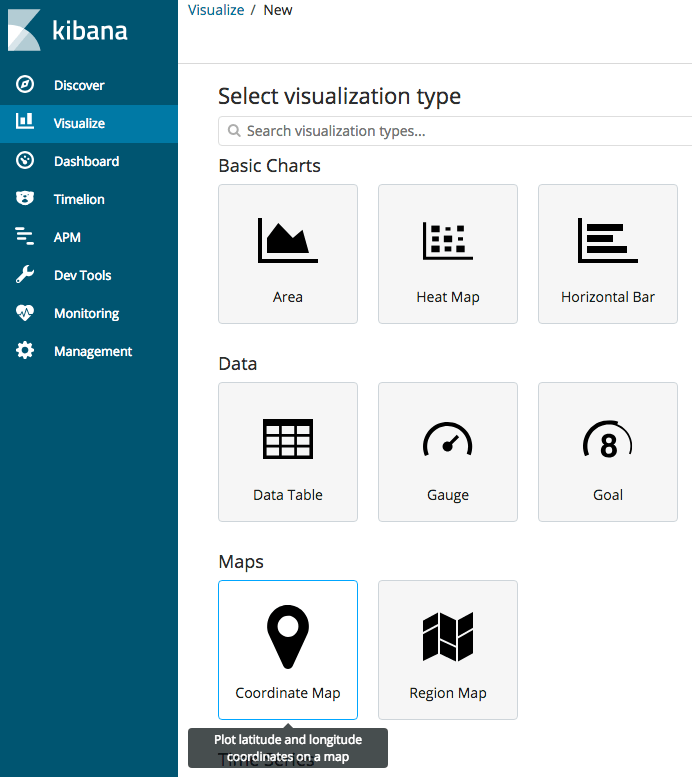
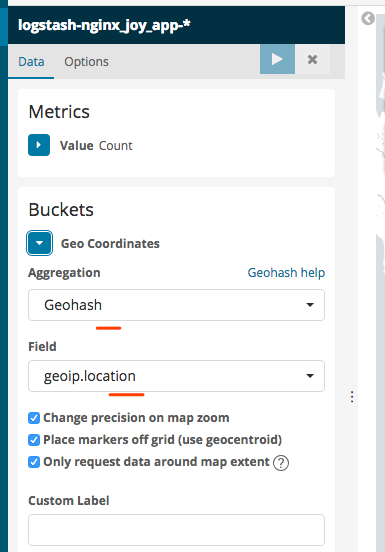
启动 kibana画图 visualize->Maps->Coordinate Map
问题整理 1、创建地图时找不到字段 **问题分析: **
索引格式为[nginx-xxx-]YYYY-MM的日志文件由logstash输出到Elasticsearch;在 elasticsearch 中,所有的数据都有一个类型,什么样的类型,就可以在其上做一些对应类型的特殊操作。geo信息中的location字段是经纬度,我们需要使用经纬度来定位地理位置;在 elasticsearch 中,对于经纬度来说,要想使用 elasticsearch 提供的地理位置查询相关的功能,就需要构造一个结构,并且将其类型属性设置为geo_point,此错误明显是由于我们的geo的location字段类型不是geo_point。
1 GET nginx_joy_app-2018.10.11/_mapping
说明创建的index中location字段类型和要求的geo_point不一致。
解决方案:
修改ES模板 logstash配置文件中的output,命名设置为logstash-xxx的index 如果以上方式还是不能解决geo_point的问题,那就碰上事了。
1 2 3 4 5 6 7 8 9 10 11 12 13 14 15 16 17 18 19 20 21 22 23 24 25 26 27 28 29 30 31 32 33 34 35 36 37 38 39 40 41 42 43 44 45 46 GET _all/_mapping "properties": { "@timestamp": { "type": "date" }, "@version": { "type": "keyword" }, "geoip": { "dynamic": "true", "properties": { "ip": { "type": "ip" }, "latitude": { "type": "half_float" }, "location": { "type": "geo_point" }, "longitude": { "type": "half_float" } } } } ``` 如果检查发现找不到任何geo_point相关字段,说明这个模板就有问题。我的理解是es启动后才会依据内置模板"logstash-xxxx",这样就有了geo_point这个字段。 但是如果logstash在es之前启动就会造成es没有来得及匹配内置模板,这样就把所有的索引都认为是应用自定义模板。这样logstash是什么数据,es展示的就是什么数据了。 ### 2、配置完logstash,但是kibana或者es不显示index **分析** * 检查filebeat配置文件中搜集的日志路径是否正确,相关日志是否真的存在。 <img src="https://img.econow.cn/2018/1539223116186.png" width="374"/> * 检查logstash中的filter是否和filebeat中的service保持一致 <img src="https://img.econow.cn/2018/1539223223935.png" width="415"/> * 检查logstash中的output,service是否一致 <img src="https://img.econow.cn/2018/1539223282424.png" width="434"/> ### logstash时区问题 2.x
input { stdin {} }60 60)”
input { stdin {} }60 60)”
1 2 3 4 5 6 7 **解决** 如果保证以上配置文件service字段一致,那么基本就没问题了。 3. logstash 调试 先上一段配置代码,关于很多文章里面都提到了rubydebug.一看其实也清楚,就是调试的,但是怎么生效能,怎么查看日志呢 需要后面使用--verbose --debug
output {
bin/logstash -f test_grok.conf –verbose –debug
1 2 3 这样直接在前台启动,便可以看到日志输出到终端. 4. logstash Nginx 代理
stream {
## 相关资料
[http://grokdebug.herokuapp.com/](http://grokdebug.herokuapp.com/)
[https://www.elastic.co/products/beats/filebeat](https://www.elastic.co/products/beats/filebeat)
[https://www.elastic.co/products/elasticsearch](https://www.elastic.co/products/elasticsearch)
[https://www.elastic.co/products/logstash](https://www.elastic.co/products/logstash)
[https://www.elastic.co/products/kibana](https://www.elastic.co/products/kibana)
[http://bbotte.com/logs-service/elasticsearch-template-and-mapping/](http://bbotte.com/logs-service/elasticsearch-template-and-mapping/)

 说明创建的index中location字段类型和要求的geo_point不一致。