使用Cloudera部署和管理hadoop集群
简介
Cloude Manager 概述:
CDH 是 Cloudera 公司对整体 hadoop 集群环境进行监控与管理的企业级大数据管理平台。
Cloudera Manager 分为:
Cloudera Manager Server:对整个集群提供监控与管理操作。Cloudera Manager Server 通过部署在不同设备上的 Cloudera Manager Agent 进行管理整体集群。Cloudera Manager Server 需要部署在一台设备上。
Cloudera Manager Agent:部署在每个需要监控与管理的设备上。负责采集运行数据与执行下发的管理命令。
DataBase:关系型数据库是 Cloudera Manager 执行管理操作时,存储整体集群情况数据
安装
先安装 Cloudrea Manager,再通过 Cloudrea Manager 在节点上安装 Cloudrea Manager 客户端,CDH,管理工具。
官方文档
一、环境需求:
- 关闭 selinux
- 各节点可以 SSH 登陆
- 在/etc/hosts 中添加各节点的主机名
二、环境准备
1、修改以下参数,否则检查主机正确性时会出现 “已启用“透明大页面”,它可能会导致重大的性能问题。” 的警告
1 | echo never > /sys/kernel/mm/transparent_hugepage/enabled |
2、取代默认 JDK
1 | mkdir -p /usr/java |
因为默认情况下安装 Cloudrea Manager 的时候会自动安装一个 JDK7,所以在这里提前替换一下。如果之后检查的时候不生效,注意删除 JDK7,然后重启服务。正常的目录如下:
三、安装 Cloudrea Manager
1 | cd /usr/src |
然后会出现以下画面,点击 Next 或者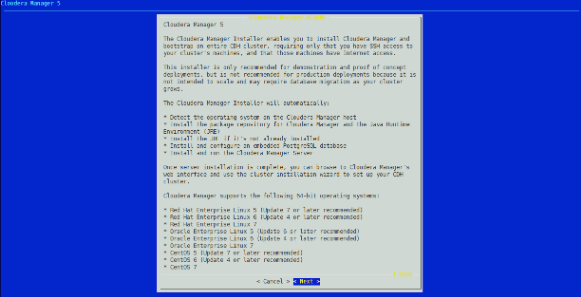
 最后安装完成,提示访问7180端口,账号密码都是admin
四、数据库准备工作
1. Mysql Install
1 | rpm -Uvh http://repo.mysql.com/mysql-community-release-el7-5.noarch.rpm |
2. Installing the MySQL JDBC Driver
If you already have the JDBC driver installed on the hosts that need it, you can skip this section. However, MySQL 5.6 requires a 5.1 driver version 5.1.26 or higher.
1 | cd /usr/src |
3. Creating Databases for Cloudera Software
以下数据库名称仅供参考,只要匹配得上就行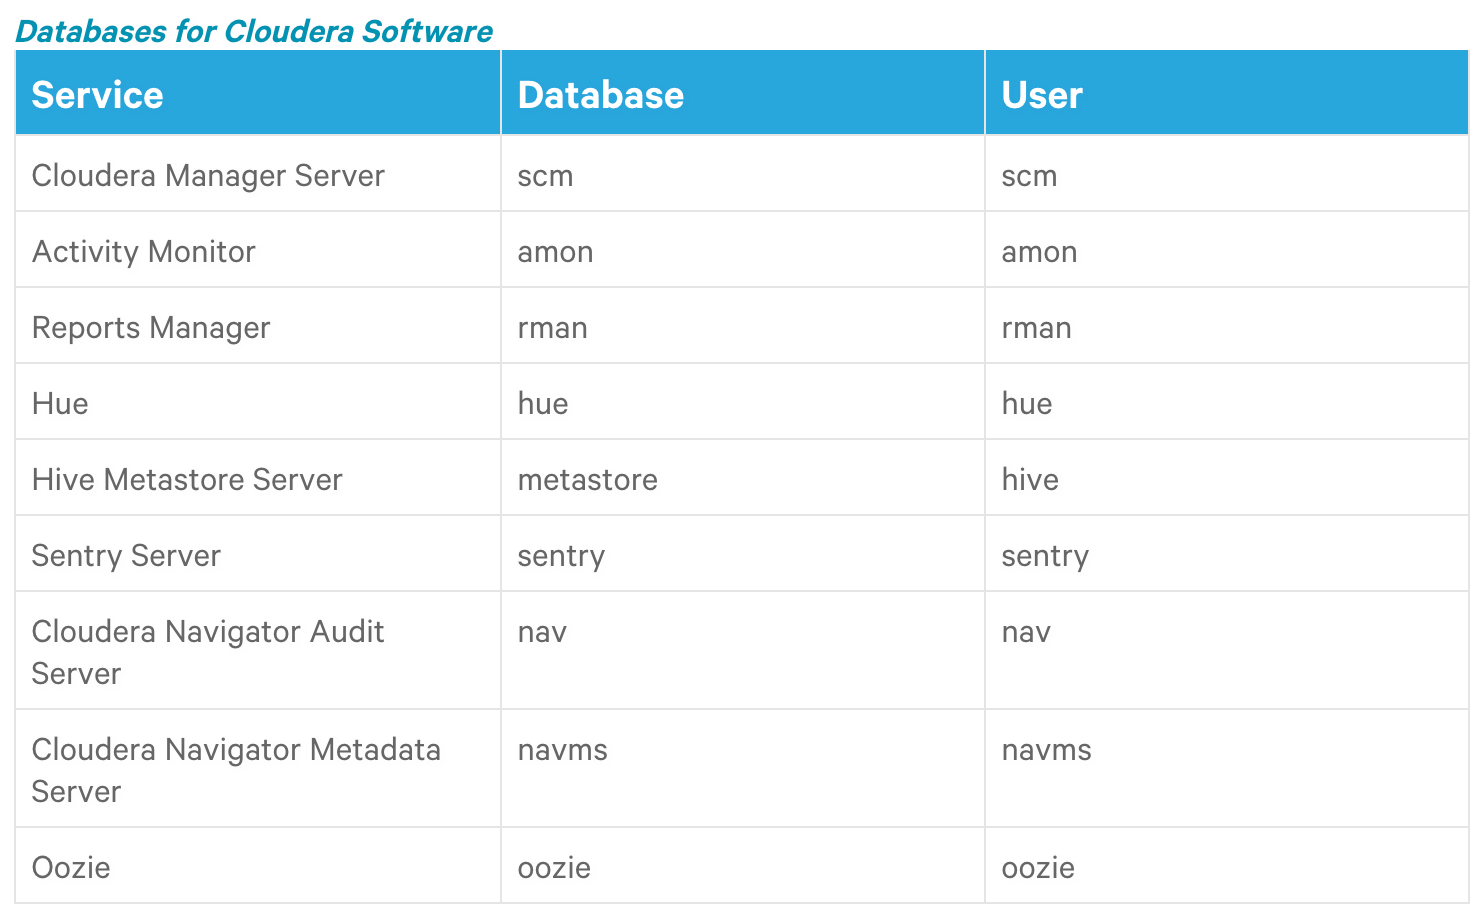
1 | mysql |
4. Set up the Cloudera Manager Database
1 | /opt/cloudera/cm/schema/scm_prepare_database.sh mysql cm -hlocalhost -uscm -pscm --scm-host localhost scm scm scm |
五、安装 Cloudrea Agent
1.搜索主机
 注意搜索的时候主机名以逗号隔开,选择后点击继续。 #### 2.选择版本 选择使用Parcel安装,选择CDH版本,默认即可
  然后选择是否安装JDK,如果已经安装了,这里就不需要勾选
  #### 3.授权 默认使用root用户,提供公钥或者密码来授权连接
  选择继续安装
  如果安装过程中,下载安装jdk 或 cloudera-manager-agent失败,可以在节点上手动安装,然后再在Cloudrea Manager上继续安装。此处的JDK只是为了启动CM,和以后要用的JDK不是一回事!
1 | yum -y install jdk |
4.分配 Parcelƒ
下载 Parcel 并分配 Parcel 到各节点

注意如果下载完后长时间不动,检查日志
分配完成后点击继续,进行主机检查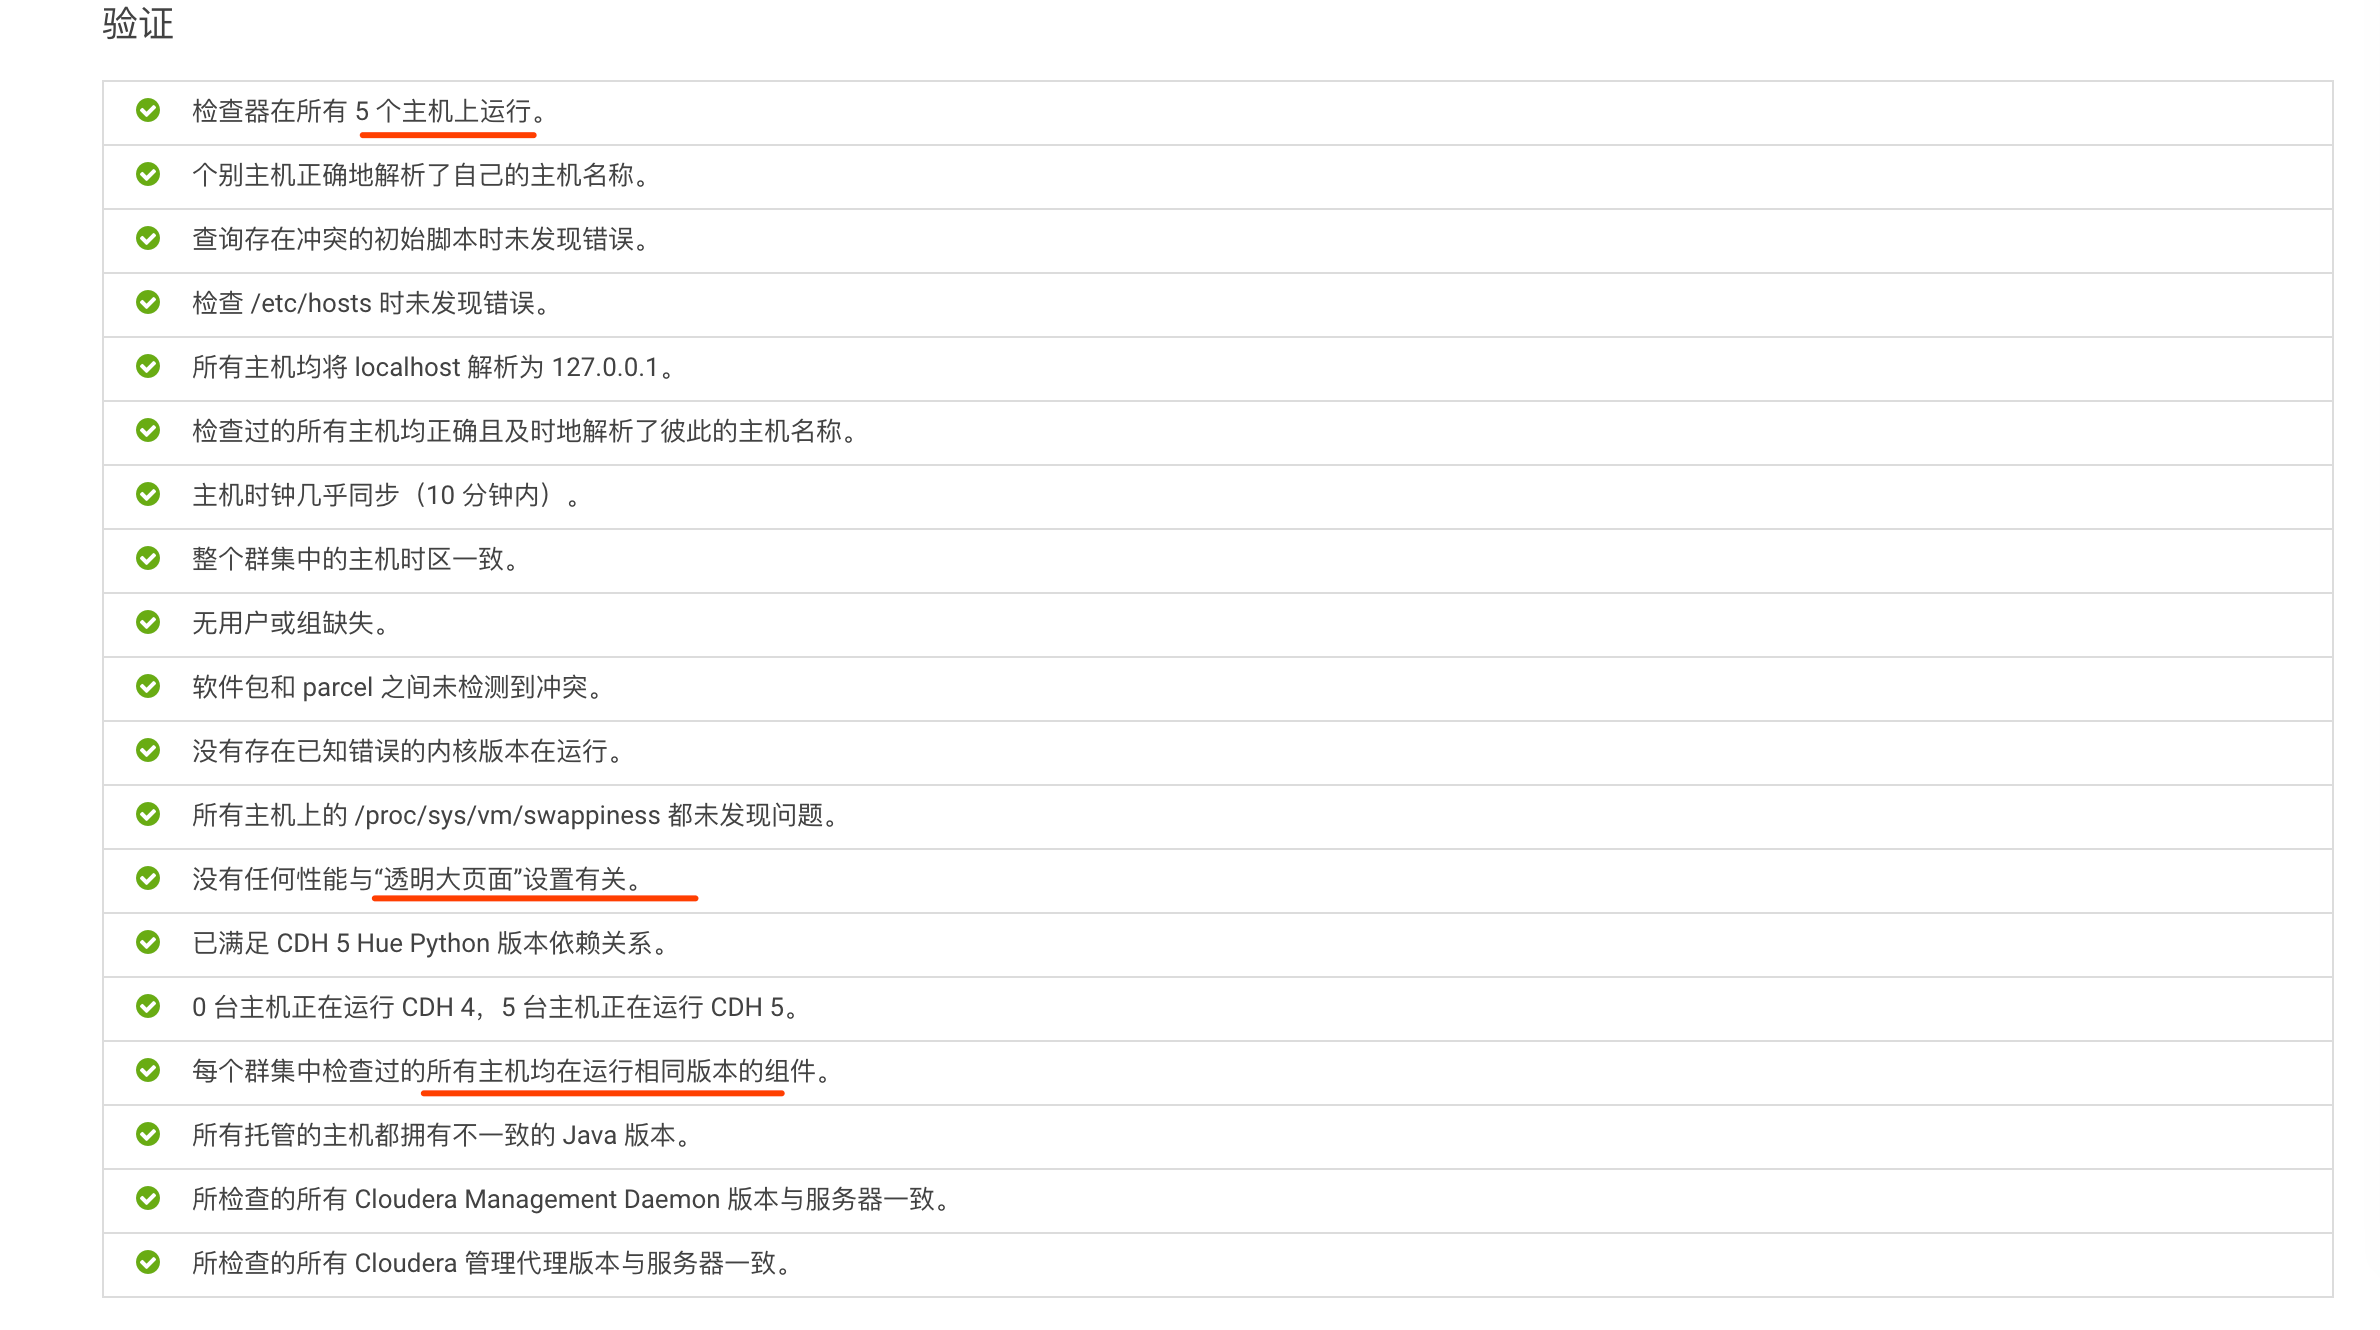
标注的为有可能出现问题的地方。解决后,选择重新检查即可。如果验证部分通过,下面的版本部分出现不适用也可以忽略。
六、添加 Services
1.选择服务
 此处会有add 的选项,点击
根据个人需求选择安装服务类型,也可以 选择自定义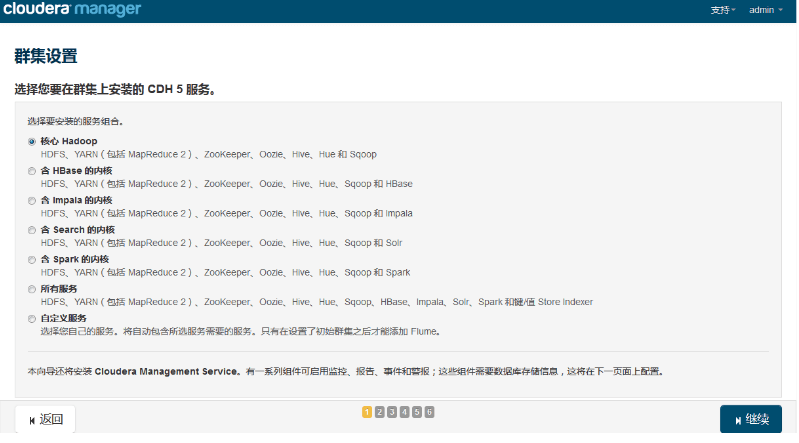
The Select Services page allows you to select the services you want to install and configure. Make sure that you have the appropriate license key for the services you want to use. You can choose from Cloudera Essentials, Data Engineering, Analytic Database, Operational Database, All Services, and Custom Services. To include Cloudera Navigator data management, check the box labeled Include Cloudera Navigator.
服务选择页面允许你选择你想要的服务,然后选择继续。
After selecting the services you want to add, click Continue. The Assign Roles page displays.
2.Assign Roles 角色分配
The Assign Roles page suggests role assignments for the hosts in your cluster. You can click on the hostname for a role to select a different host. You can also click the View By Host button to see all the roles assigned to a host.
To review the recommended role assignments, see Recommended Cluster Hosts and Role Distribution.
After assigning all of the roles for your services, click Continue. The Setup Database page displays.
简单说就是根据实际情况来分配对应角色。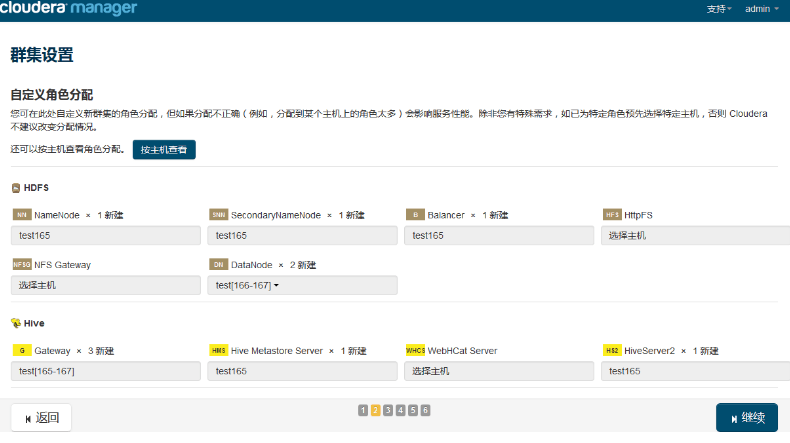
官网推荐分配策略参考
下面分别列出 3-10 和 3-20 台服务器的建议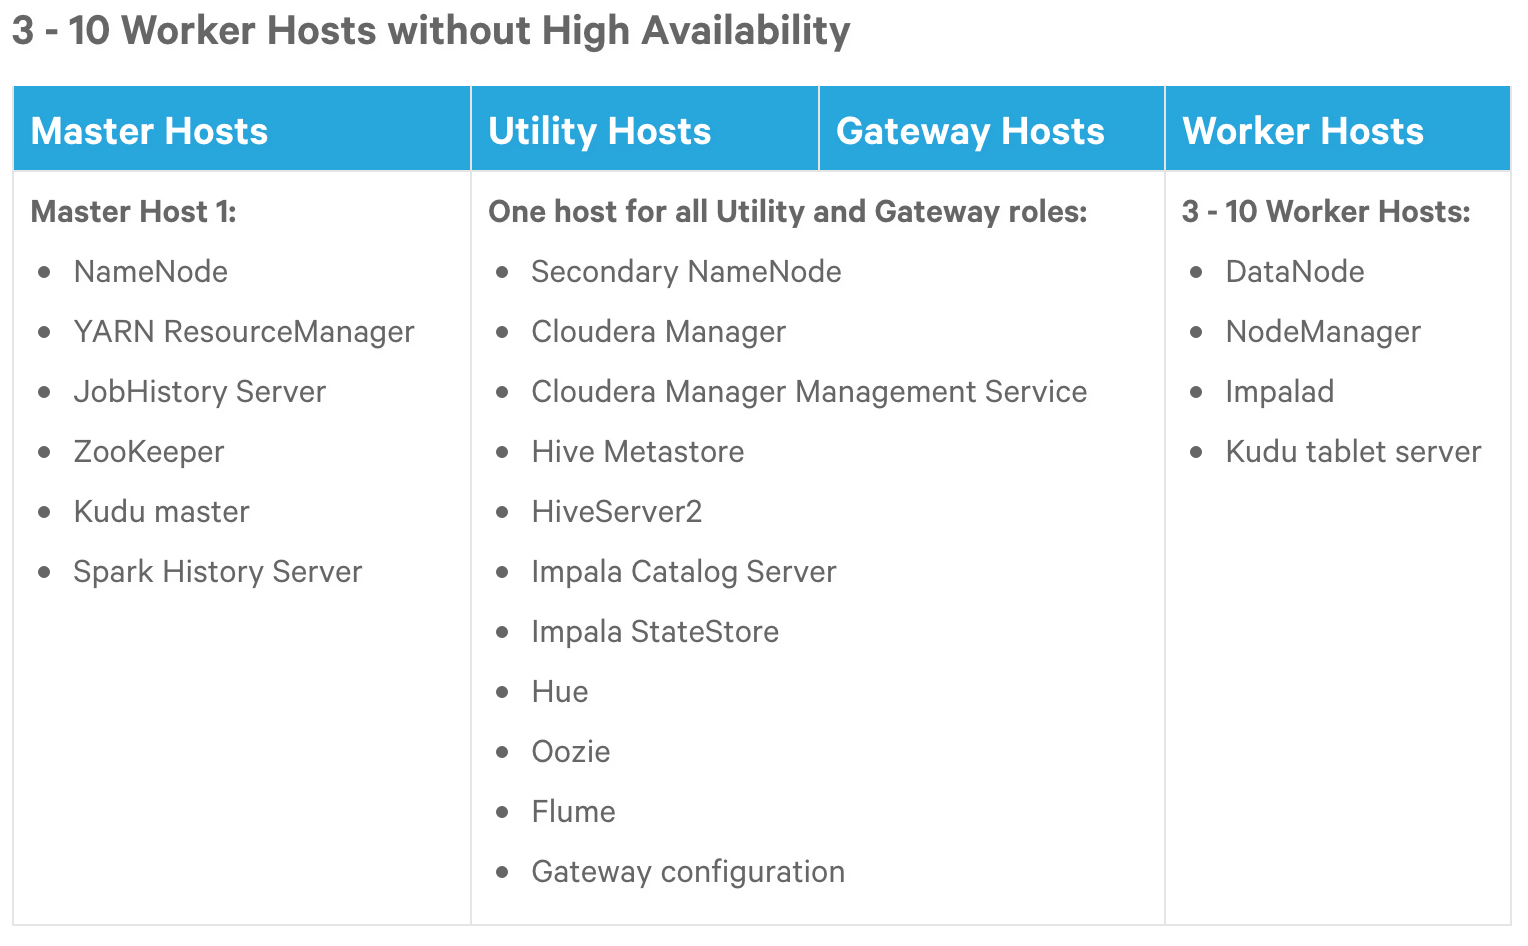
 下图为实际情况5个节点的分配
  #### 3.Setup Database >On the Setup Database page, you can enter the database names, usernames, and passwords you created in Step 4: Install and Configure Databases. 现在开始填写数据库信息,地址、账号和密码,就是之前准备环境的时候创建的库。 >Select the database type and enter the database name, username, and password for each service. Click Test Connection to validate the settings. If the connection is successful, a green checkmark and the word Successful appears next to each service. If there are any problems, the error is reported next to the service that failed to connect.
After verifying that each connection is successful, click Continue. The Review Changes page displays.
 注意选择Mysql!填写完成后记得验证一下。下面的库就是之前创建好的
  现在表是空的,之后就会创建以下的表
  #### 4.启动服务
  一般情况下除了hive以外,其他的服务都会正常启动。这个时候就要去修改以下hive配置。另外开一个页面,按照截图修改!
  这样之前的hive元数据库就会自动创建表了。
集群验证
1.服务状态验证
 这样所有的服务都绿了。 ### 2.主机状态
  状态正常,且心跳时间小于15秒 ### 3.1任务测试一 登任意主机,执行下面任务(用Hadoop计算PI值,圆周率) 10指的是要运行10次map任务,10000指的是每个map任务,要投掷多少次,2个参数的乘积就是总的投掷次数。
1 | hadoop jar /opt/cloudera/parcels/CDH/lib/hadoop-mapreduce/hadoop-mapreduce-examples.jar pi 10 10000 |
 然后在群集-》Cluster1-》Yarn-》应用程序查看执行结果
执行结果: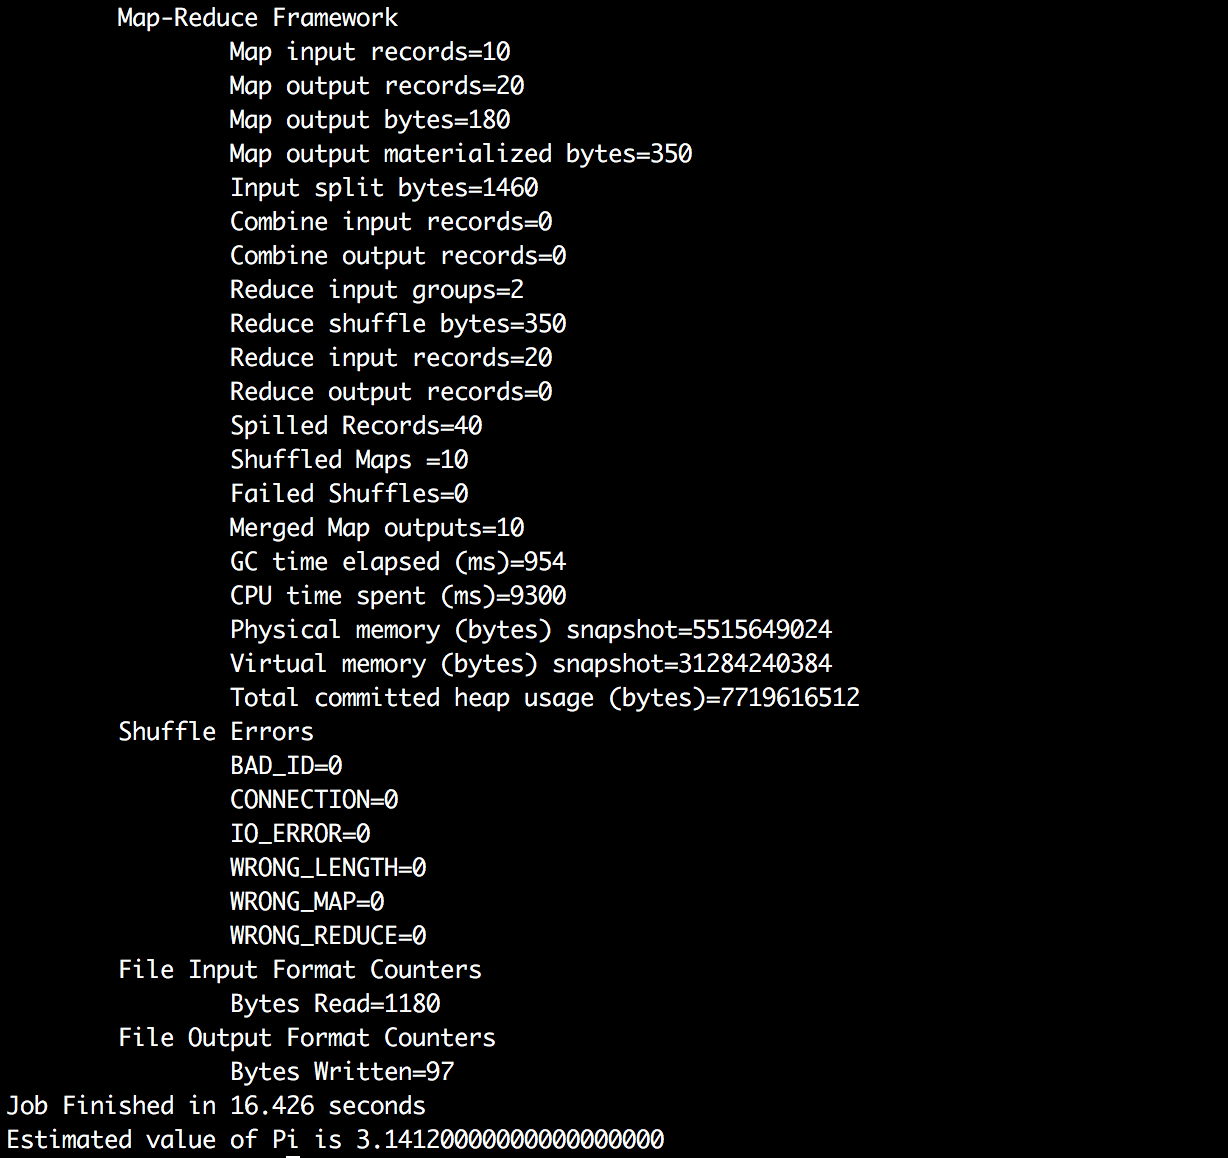
3.2 任务测试二
1.编辑一段文本,示例如下;
1 | aslkl hello |
2.上传文件到 hdfs
1 | hadoop fs -mkdir /test |
4.1 MapReduce 测试
创建表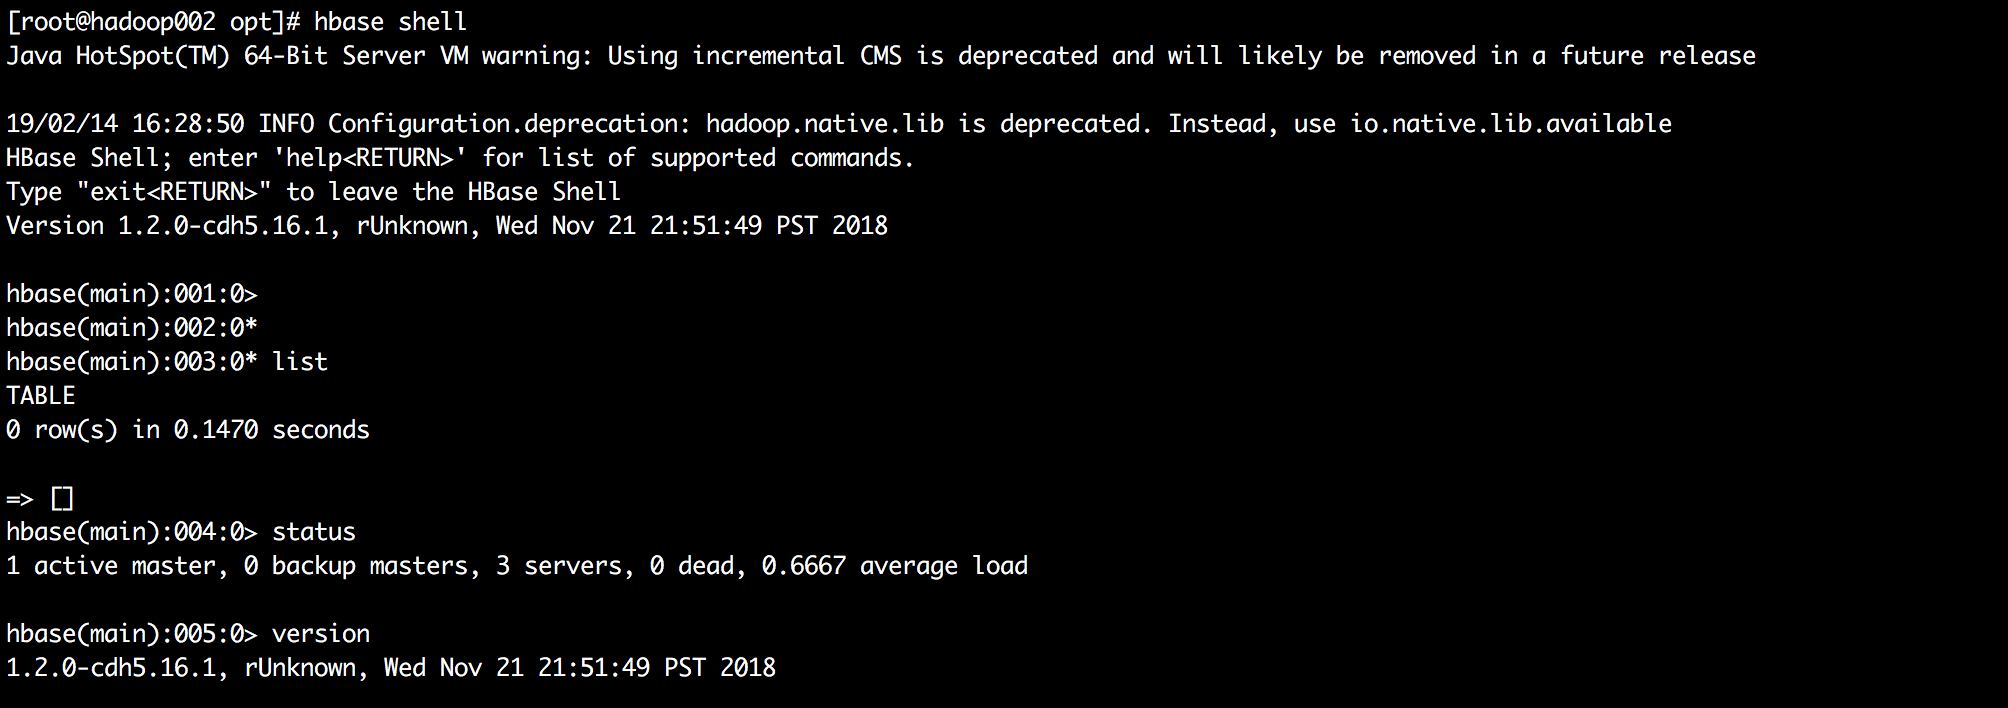
执行操作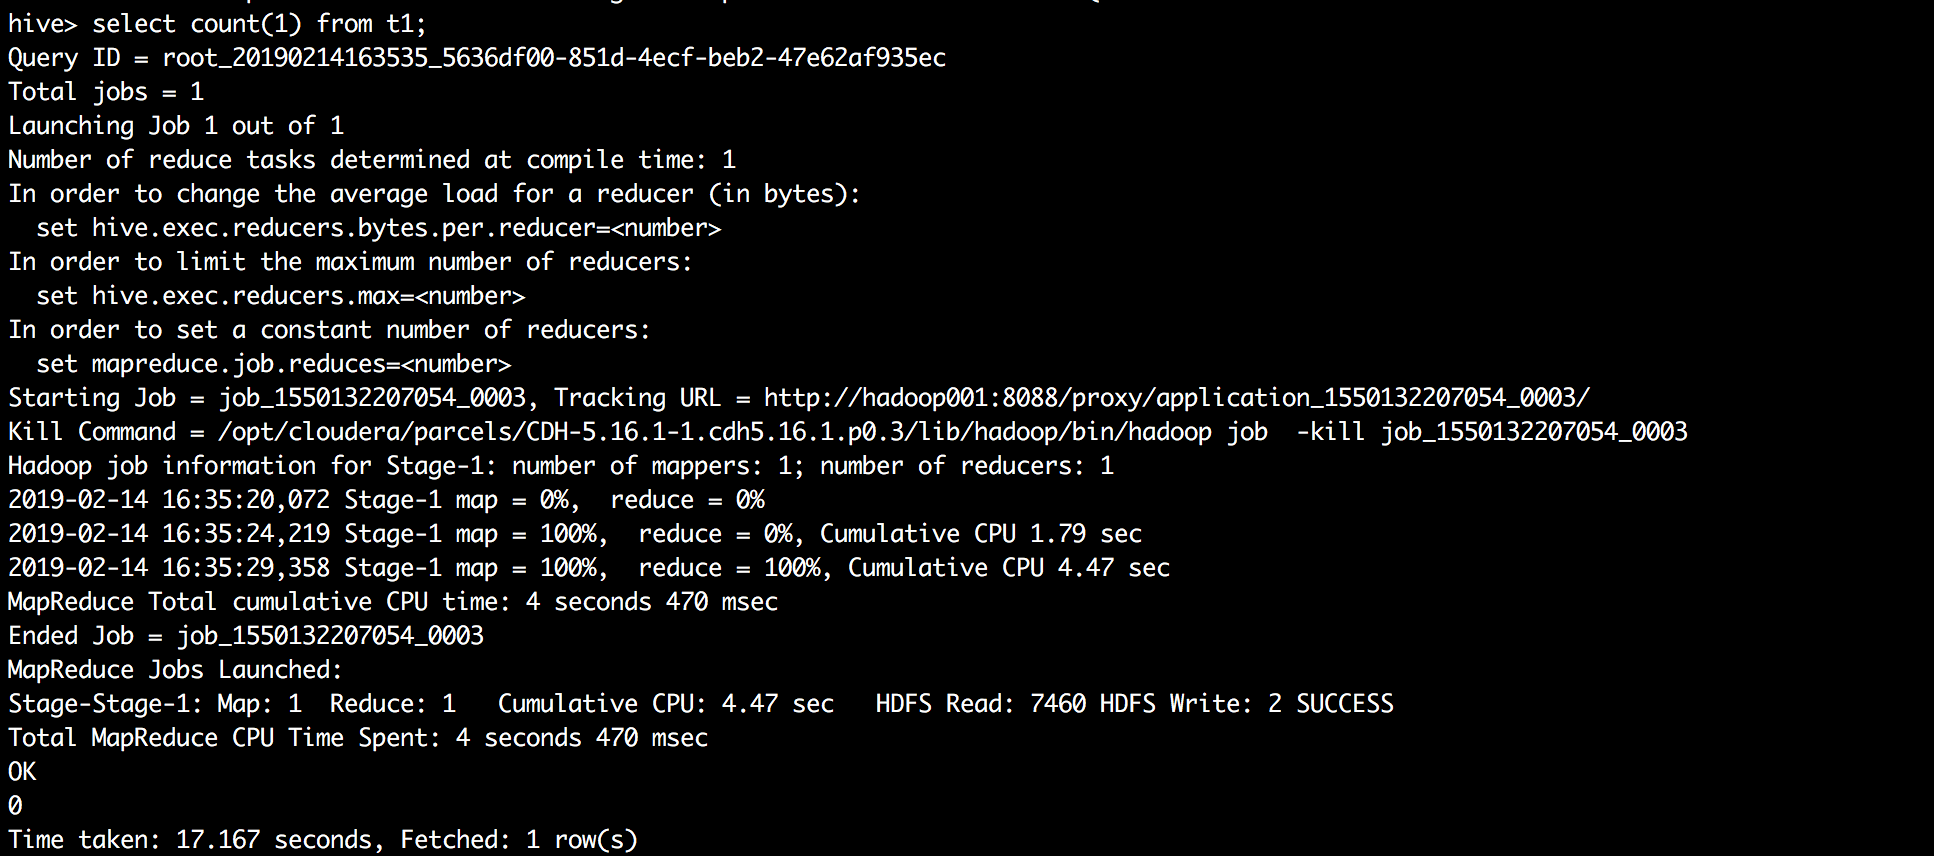
OK!
其他
1.优化访问速度
 ### 2.部分命令
1 | service cloudera-scm-server stop |
 点击配置,搜索alert,根据实际情况填写邮箱信息。注意区分25和465端口,并且保证邮箱地址正确。
  页眉和页脚随意修改
  修改完成后点击保存,然后重启!
2.测试邮件
 点击发送测试即可
  这样就收到了测试邮件。
  #### 3.可能出现的问题 * 日志报localhost和25端口
  原因是修改配置后没有重启cloudera manager service * QQ邮箱报535错误
  检查用户名和授权码是否正确。注意QQ邮箱的是授权码不是纯粹的密码